Create Pandamonium
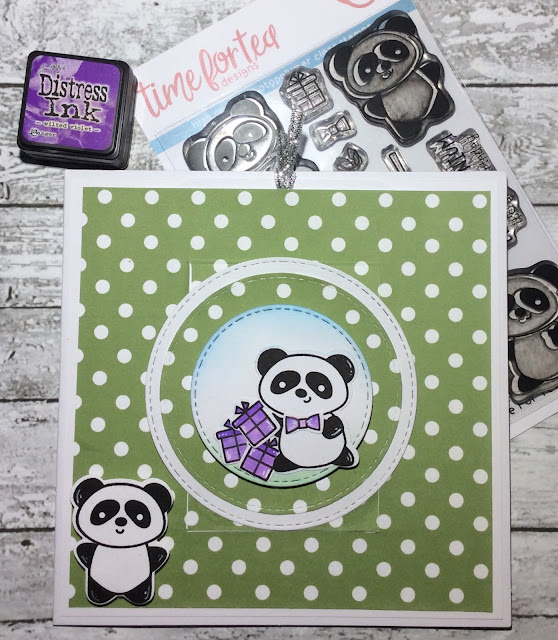
Today I want to share with you this card that I recently made using Time for Tea Designs Pandamodium Party...
This is a design that I saw Sam Calcott make and if you would like to try one for yourself then Click here.
I started by taking a piece of patterned paper in this case I used polka dot cardstock from my stash and cut it down to 5 1/2 x 5 1/2 inch's. Then i flipped it over and marked out 1" and 1 1/2" from both sides top and bottom and joined then up.
Next I rotated the \piece and marked out 1" from both sides and joined these up also.
Now the fun part make a note of the top and then using a sharp blade cut :0 and I have included this next image to try and help visually describe how!
I also followed Sam's tutorial and added to the image where the glue will be added later! Where the cut is, we now need to score a burnish, at 1", 2 1/2" and 4" from the bottom up...
Next I took a piece of white cardstock 5 3/4 x 5 3/4 inch's and using the patterned piece, place on top and with a nice equal border mark out where the cut will leave an opening and then stamp whatever you like into the open space, as you will see from the next image I used one of the sentiments from T4TD Pandamonium Party...
The next step is to take another piece of white cardstock measuring 3 1/4 x 4 5/8 inch's which will create out a pull tab section. This area can also be used to stamp a sentiment which you will see as this is what I have done. Now its time to add this pull tab to the patterned piece. On the 1" tab at the bottom of the cut section use tape or wet glue and then attach the pull tab piece of cardstock making sure to align it centrally. Next its time to adhere this whole piece to the white layer by placing glue on the areas around the cut section as shown in one of the previous images which I hope makes sense?! But of course you can watch Sam's excellent video tutorial which explains the process much better than I do!
The next thing to do is to decide what sort of topper you would like, I chose to go with my nested circles and of course one of the adorable Pandas from T4TD. I used Wilted Violet distress ink to watercolour some of my images and then using the corresponding dies I die cut all my images. My smallest circle has a light blending of Tumbled Glass to appear like sky and the Mowed Lawn to give my Panda some ground to stand on. I felt he would look a little lonely and so I also gave him a friend to keep him company! The final task's are to adhere all of our hard work onto a card blank and for this I've used a 6 x6 inch one and then we need to add some ribbon to our pull tab section by using either a punch or making a small hole with a pokey tool, awl or something similar.
I hope you like my card and feel inspired to try something similar yourself...
Happy Crafting
Sarah Louise
xXx


Great card Sarah! I'll have to give this technique a go!
ReplyDelete